This weekend, despite massive amounts of work which still need doing, I shall be devoting all of my time to laying a floor.
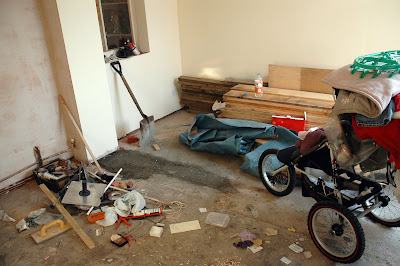
I have recently finished building the extension to my kitchen and it's time to get the Western Hemlock down on the floor, since I had it delivered back in September.First off, I have decided to fill some of the larger holes in the floor with concrete. Since this will only be under the floor I am using up what I have available, so I make sure that the old man-hole (which still has a drain below it) the two ancient soil pipes and the washing machine soak-away are properly finished and then mix up whatever I have lying around, which amounts to some never-set slab mix, some pre-mixed mortar, loads of cement, some of the awful white gravel from the garden (which was here when I moved in) and a couple of shovelfuls of sand from the children's sandpit.
Do I own too many white goods?
When this is good and grey I chuck it in the trenched left from removing the walls and call that good enough for government work. I did this last thing on Friday night, along with emptying the kitchen into my living room, with the exception of the cooker, so that I can start first thing on Saturday morning.

This concrete is too strong a mix for any other use
The joists have come from Haldon Forest, as did the rough-hewn Western Hemlock planks. The FC asked me if I could dispose of the unsightly pile of beams in their turning bay and I was happy to oblige.
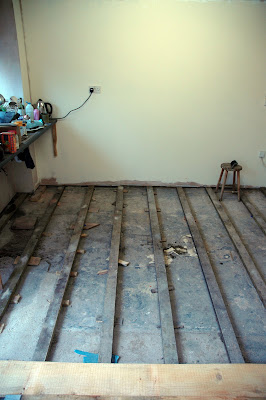
It is not clear in the photographs, but there turned out to be 10 inches less than I needed, which saved me hundreds of pounds, as well as helping out the Forestry. Everyone is a winner. I laid out the joists, and my father and I vaguely worked out where the highest point in the floor was, using a plank across the beams, and started work from there.

Traditional 16" centres have made way for 400mm in recent years.
One at a time, we laid the beams down, making sure that joins were not matched, and packed them out to our level. I used some really rather costly anchors, which have a built in, rawl plug, meaning that we could drill a hole through the timbers and the concrete and then just hammer and screw the fixings straight down.
Additionally we got some window spacers from Spike which I have no idea of the cost of yet, but which were useful enough for this task that I doubt I shall be upset when I do find out.

13" apart and parallel as railway tracks. ish
As we got closer to the area where the three main original floors meet (the old outside toilet, the yard and the existing kitchen) the floor fell away by 4 or 5 inches in places, but I had plenty of timber for the purpose.
Once all the main joists were down, I laid boards upon them. Whilst it was unavoidable in many instances it made good sense to lay the joists so that a full plank would fall midway across them to reduce waste.
Here you can see, on the left, where an extra support has been laid to account for the indentation of the doorway and also, on the right, an extra support in the high traffic area just inside the French windows. This is mirrored at the doorway through to the living room and also under the sink where the washing machine will be.

The quality of my counter support should not go unnoticed.
Once this was done it was time to lay boards. The first span went down with an approximate 2mm gap from the sides to allow for growth (many moons ago, another Lord Manley split an iron trailer in half when the decking outgrew the welds) and after that the planks were tightly butted up against one another.

I find blacksmiths' cut nails extraordinarily beautiful
As the planks are rough hewn there is a choice now facing me: plane the edges of the boards for a tight fit or crimp them together. Jim is of the opinion that a rustic look is best suited to our Edwardian house and I agree. Planing isn't a huge job with my machine, so it's not a matter of idleness. In truth, the crimping will be a much greater job, especially as some of the planks will need to be planed a little anyway, but if it is too square and perfect it will stand out in a house where everything is a little wobbly.

Look at the wedge on THAT!
After an initial run with wedges between the boards and a fulcrum screwed to the supports, I moved on to a spacing beam. This method is slow, but works well. Sadly there is only so much time available in a day and, not wanting to upset the neighbours, I stop.

Splinter world of adventure
I'll try and get it finished tomorrow. In the mean time, I know what you came here for. I weigh 192.6lbs.
==============
I am having a poo
==============
I weigh 191.9lbs. Not that impressive after such a day's graft.
Right, I'm off to play tight-rope walkers with the children. Have a lovely night.


No comments:
Post a Comment